3D Printing for Anyone
3D printing has been around since the early 1980s. Like the early days of computing, it was the purvey of universities and innovative individuals with large garages as the equipment was bulky and needed constant development and maintenance.
As computing made its way from hermetically sealed caverns to our desks and pockets, the technology needed for 3D printing has come down in size and cost. It’s not quite in our pockets yet but it is on our desk tops. So now, instead of printing diagrams across a flat sheet of paper, we have the facilities to print the 3 dimensional structure itself, pass it around the room, test it and refine it and in many cases put it immediately to use.
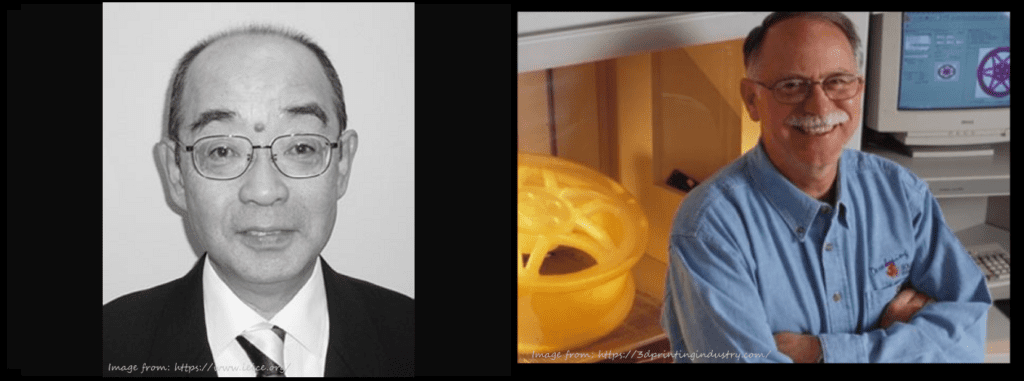
Hideo Kodama developed early 3D printing in a form called stereolithography to a point where it became commercially viable. Unfortunately for Hideo, despite his career as a patent lawyer, he missed the patent application date. Across the Pacific in North America, Charles Hull who was working as a professor of engineering, did not miss the date. Both Charles and Hideo are credited as the grandfathers of modern 3D printing processes.
Since then, 3D printing has been through some interesting times that alternately read like a utopian exercise in altruism and a John Grisham spy novel. We are currently in a period of explosive exploration where manufacturing boundaries are being pushed further and further back. And there is a lot of altruism for the moment.
Right now you can walk out your door, head to your nearest office or home electronics equipment store and pick up a 3D printer for under $1,000. It won’t produce high-tensile, fine detail, fully functional masterpieces, but it will give you the ability to create relatively small, simple design models that may be all you need, or allow you to concept test your build before taking it to a professional printer or more traditional technique based manufacturer. Once you pop over the $1,000 market options start opening up and more complex geometries and functions start to be possible.
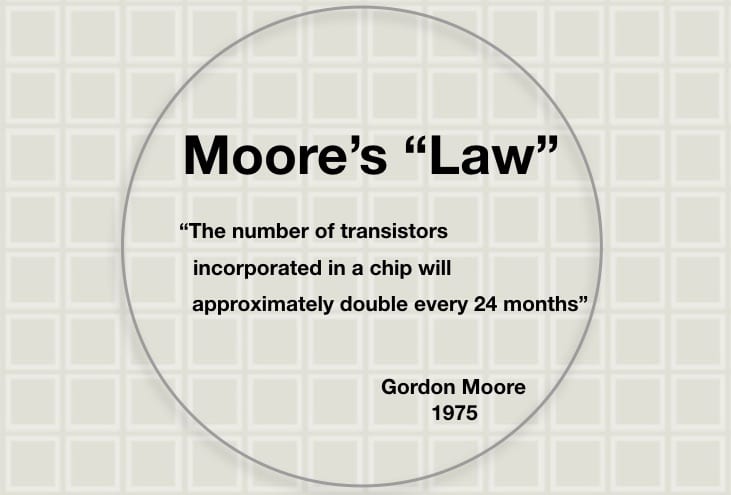
3D printing is a rapidly evolving area. It is already demonstrating Moore’s Law rates which means it is easy to get left behind as progress marches on. Just like watching your kids streak ahead with online gaming, learning and communication platforms that have their own languages and customs, 3D printing is going through a stage of determining its own conventions and standards.
Gutenberg’s Grandchild is a collective of clinicians in a variety of fields of medicine, from emergency, anaesthetics and ICU to surgery and prehospital medicine who are using 3D printing. None of us have degrees in engineering, industrial design or the computer sciences. We are all clinicians who work our regular day jobs, looking after patients. We work on 3D printing in our spare time or as a part of our research agenda. The point being that if any of us can get get started in 3D printing, so can any of you. And who knows where you might take it.
Gutenberg’s Grandchild will be here on Life In The Fast Lane with regular pieces to help you get started in 3D printing, offering the tips, tricks, traps and resources that we have discovered and used along our own 3D printing journeys. We’ll be particularly focused on content that benefits clinicians, filtering out the extraneous and acting as your central repository of information. By the same token, if you have anything that you would like to contribute, if there is something you specifically want to know about or we’ve made an error, please get in contact ([email protected]) or leave a comment and we’ll try to sort it out.
Happy printing
Update 08/04/2019: It was pointed out that the wrong Hideo Kodama was pictured in the image above. This has now been corrected. Apologies to all concerned. Mr. Kodama was granted a Lifetime Achievement Award in 2014 for his work by the Institute of Electronics, Information and Communication Engineers (IEICE) which you can read about here – https://www.ieice.org/eng/about_ieice/new_honorary_members_award_winners/2014/gyouseki_06e.html.
3D PRINTING
Gutenberg’s Grandchild
A Dubliner living in Sydney. Critical care (ED, ICU) and motor sport physician. FOAMed knowmad. Podcaster, 3D printing tinker and digital reality journeyman. Bassist and drummer. Cyclist. | @rollcagemedic | Website |

Thanks for an awesome start Matt! We look forward to sharing our #3DP4C ideas with the #LITFL community!
Great Jas. As you can see we are ready to roll.
Great job Matthew!
Any tip for a 3D tracheostomy kit?
Thanks Roberto
Not specifically but I would be looking at Andy Buck’s (@edexam) CICO Trainer [https://www.thingiverse.com/thing:2530474] and then modifying one of the Cric Larynx Trainers that are about [Andy’s CICO trainer includes one or you can use mine https://www.thingiverse.com/thing:2533920%5D to get a bit more length on the tracheal portion (Basic CAD modelling would do the trick).
Print the Cric Trainer Neck in a hard filament (ABS, PLA) which will give you reasonably relevant local anatomy with regards to the presence of a chin and sternum (Andy was the first person to do something about skills workshops that place a bare cric trainer on a table and ignore local anatomy that gets in the way. This is work that will no doubt get modified in the future as 3D printing advances; e.g. a basic articulation between the head and neck to encourage learners to position the patient optimally).
Ideally, print the Cric/Perc Trache trainer in a flexible. PolyFlex or an equivalent gives a good mix of flexible and robust. Something like NinjaFlex may be a bit too flexible and is difficult to work with.
Of course, much of this will depend upon whether you have access to a 3D printer or need to go to a commercial print service (often a bit pricey and very dependant on what materials they will print in).
Hope this helps.
Great addition to the site, Matthew! I’m looking forward to seeing what people are doing.
If I can also comment to Roberto – I printed a bunch of cric training models earlier this year for a session we did in sim lab. They were modifications of Andy Buck’s (actually ended up going back to the more detailed anatomy model in Thingiverse that he seemed to have used) and then after several prototype prints found that I couldn’t reliably print it all in one piece. When printing the base plate in ABS, I found that even with a heated platform and protection from drafts I was getting a lot of lift and distortion of the large flat surface.
My solution was to remove the base plate from the model (I use TinkerCAD as it’s so easy) and glue the prints onto hard smooth plastic. We considered simulating the cric membrane with fabric-reinforced duct tape, but found it too tough.
I think if your printer is working well, or you use PLA, the lifting may not be a problem – but my message is Don’t be afraid to experiment.
Given time, I’d like to develop the model with limited-movement articulations to simulate the degree of flexibility of the airway, but this may be a waste of time considering the exercise is to train the procedure, not make it perfect.
Good luck and let us know how it goes.
Hi Dean,
That’s the beauty of all of this. 3D printing is highly customiseable. There is a ton of available software out there (we’ll cover some of this soon) for which the learning curve is often not as onerous as it might initially appear.
Your comment also highlights that it often takes a bit of tinkering with printer settings to get models and certain filaments to work just right. While there are general guidelines, like patients, each print needs a bit of tailored input for the best results. (Again, this is something that we’ll cover soon)
Happy modding
Matthew
erm .. litte thing here … your picture is showing us Hideo Kodama … yes, but this is not the correct Dr. Hideo Kodama, your picture shows us an german car designer from Opel.
Hi Madda,
You are absolutely correct. And it seems that I’m not the only one who has made this error as a number of other 3D Printing resources have perpetuated the mistake. I’m making the correction right now. Thanks for pointing it out.
Happy printing
Matthew